

Updated: 9/2/2024 | DIY Rhinestone Hat Tutorial
I attended Burning Man in 2024 and wanted to embellish my hat this year. I wanted it to sparkle in the sun and allow people to find me in a crowd easily.
I took one of my FAVORITE hats, the Barcelona Straw Hat by American Hat Makers, and bedazzled it to my liking!
The process was super easy and fun! Affixing the jewels took me less than three hours. The hardest part was waiting for my hat to dry completely so that I could wear it.
Below are instructions on how to bedazzle your favorite hat!
Related: Watch our DIY Rhinestone Cowboy Hat video on Instagram
The DIY Rhinestone Hat Guide
#1 Choose a Hat
For Burning Man, I know I wanted a hat with a chin strap. It gets VERY windy on the Playa and a chin strap will help secure your hat to your head and body.
I prefer a straw hat because it’s lightweight yet will keep you cool. I opted for a high-quality hat so that it would last me for years to come.
I opted for a hat with a very firm shape and looked similar to a cowboy hat. Most cowboy hats do not come with chin straps, so I opted for the Barcelona straw hat by American Hat Makers.
#2 Decide on a Style and Color
I wanted a sturdy sunhat styled with green and iridescent jewels. Sunhats are typically lightweight and can have a soft or firm body.
I opted for a firm body so the hat would keep its shape regardless of the weather conditions.
#3 Buy the Right Equipment
Here are the essentials you’ll need for the DIY rhinestone hat project:
- E6000 Plus Craft Glue – You can use the regular E6000 glue but it will take 48-72 hours to dry. Plus is much quicker at 24-48 hours.
- Gems/Rhinestones – Get an assortment of gems and rhinestones.
- 3-5 large set gems or crystal appliques
- Buy a fun dangling trim for the crown of your hat.
#4 Layout Your Gems and Rhinestones
This part took the longest for me. You want your gems to be symmetrical and cohesive.
Lay out your gems on a tabletop before gluing them on. This saves you from making mistakes and wasting any product.
Play around with different designs to find out what looks great to you.
#5 Use craft glue to affix your gems and rhinestones.
Now that you have your designs set up, it’s time to transfer them onto your hat. Use E6000 Plus Craft Glue to glue on your jewels.
This glue can be sticky, so be prepared to get your hands messy. I recommend holding the tube with the top directed up towards the sky. Squeeze the tube to push glue out each time you affix a jewel.
#6 Let the hat dry and cure completely before wear.
Craft glue needs time to cure. This will make your jewels stay in place on your hat for a long time if not permanently.
Craft glue will typically stay in place 3-4 hours after application and will require 48-72 hours to completely cure.
#7 Store Your Hat Properly
Now that you have a unique piece of art, you need to be sure to stow it with care. We recommend using a hat box or bag to keep the hat safe.
We like to use a desiccant to prevent our clothes and accessories from getting moldy or rusting. These little packs are typically found in apparel packaging and can keep your belongings dry in humid weather.
DIY Rhinestone Cowboy Hat Video
Watch my DIY Rhinestone Cowboy Hat video to see how I created this hat!
View this post on Instagram
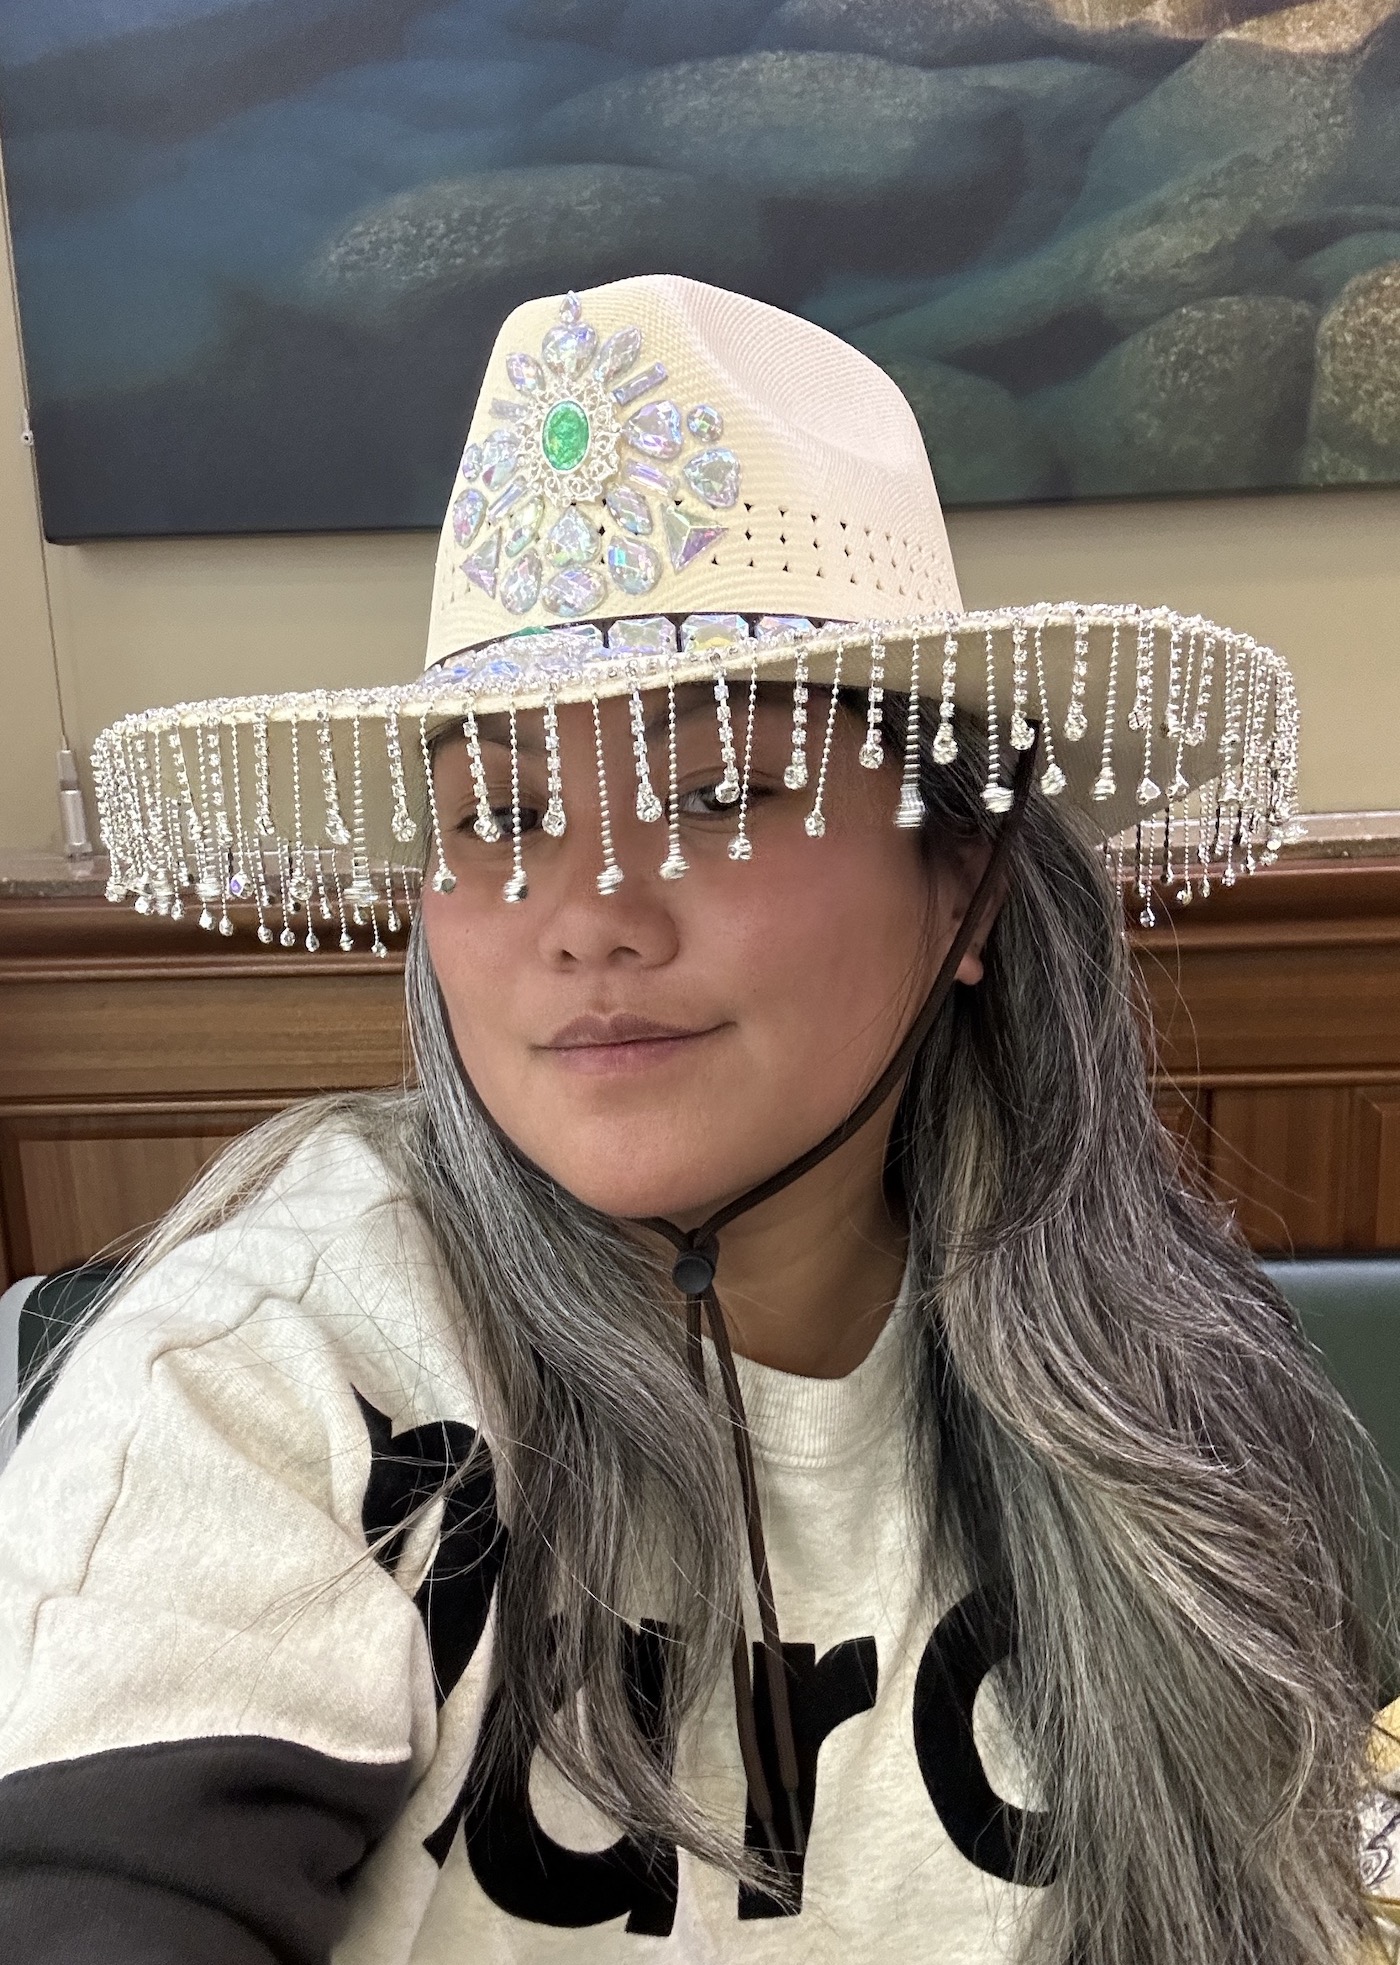
Here is our finished product!

DIY Rhinestone Hat
The process is super easy and within hours/days, you have a $300 hat you made for less than $100. How awesome is that?
And it’s uniquely yours because you put in the (not so) hard work to make it.
Try making a DIY rhinestone cowboy hat and let us know what you think!
DIY Rhinestone List Shopping List
Check out my Burning Man 2024 video to see how I styled my hat!
If you found our DIY Rhinestone Hat tutorial helpful, please share it. Thanks for your support!
Thank you for visiting today! If you found this encouraging or informative, please connect with us on Instagram or TikTok. Sign up for our monthly newsletter for updates and more. We promise we won't spam you! Feel free to unsubscribe anytime. If you're a brand and want to work with us, please visit this page to get in touch.