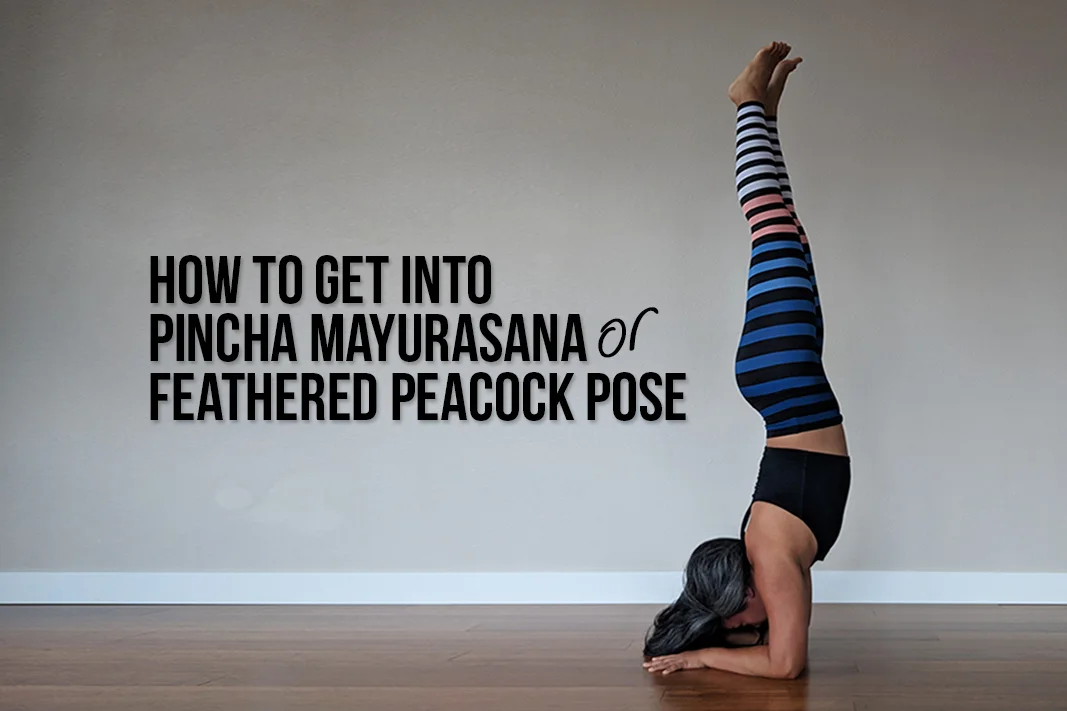
Pose Name: Pincha Mayurasana (peen-cha my-err-ah-sah-nah), Feathered Peacock Pose, or Forearm Stand.
Pincha = Feathered
Mayura = Peacock
Asana = Pose
Mythology: Karttikeya was born to Shiva and Parvati to eliminate the Rakshasa brothers Surapadman, Simhamukha and Taraka who had defeated the devas and subjugated them with their atrocities. After Surapadman was defeated, his body was split into two entities – a peacock (mayur) and rooster (kukkuta). Mayurasana and Kukkutasana are both dedicated to Karttikeya.
Level: Intermediate/Advanced
Type of pose: Inversion (pose where feet or hips are above the head)
Benefits: Strengthens the arms, shoulders, core, and back; opens shoulders; improves balance while upside down.
Props Needed: Yoga mat, yoga strap, and yoga block
Instructions
- Bring your mat over to a wall.
- Come onto your hands and knees facing the wall in table-top position. Your fingertips should be 1.5′ foot away from the wall. This will give you space to kick-up into the forearm balance.
- Bend your elbows to bring your forearms and palms flat against the floor. Your forearms should be parallel and fingers pointing toward the wall.
- Find your drishti (focus point) at a comfortable place in between your forearms. ALWAYS keep your drishti in on point and feel your body as you move into the pose. Arms should be bent 90 degrees, with the shoulders directly over the elbows in the final position.
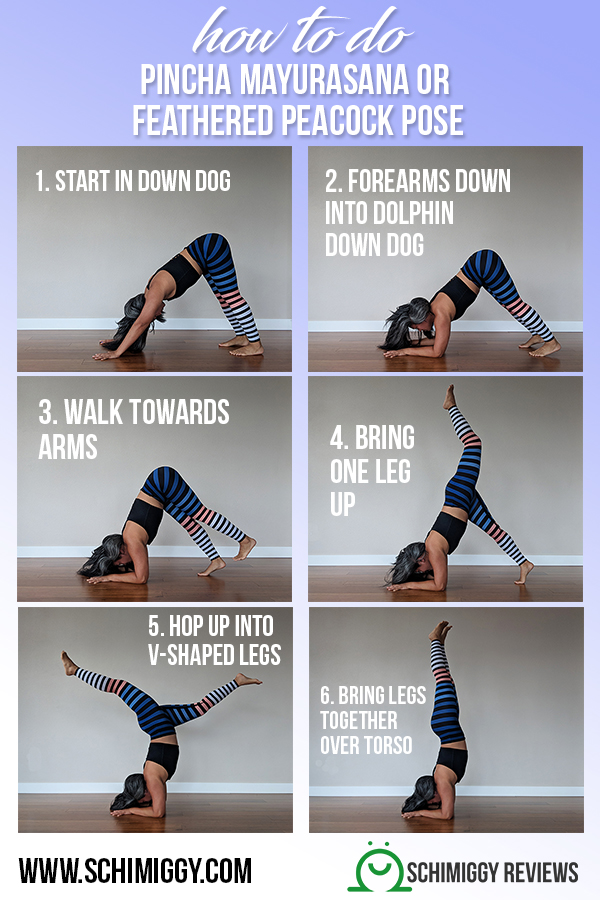
- Curl your toes under and lift your hips to come into dolphin down dog pose. The legs should be straight with a slight bend in the knees.
- Begin to walk your feet in toward your elbows as much as possible. You will feel your hips come over and land above your shoulders.
- Lift your dominant leg (the one you prefer to lead with) to a three-legged dolphin dog position. Point the dominant foot’s toes towards the sky and then begin to shift it towards the wall. You will feel a deep stretch in the back of the grounded leg and in the dominant leg’s front hip.
- You can bend the knee of the leg that is still on the floor and begin to hop up into a position where your legs are in a v-shape over your torso. Keep pulling with the dominant leg towards the wall to lift the bottom leg. Note: You can also land both feet against the wall as you work on just experiencing being upside down.
- Once you have mastered the v-shape legs, try bringing the legs together and above your torso. Be sure to do the following (from bottom to top) to get into the fullest expression of the pose:
- Press through your forearms into the mat,
- Keep your drishti in between your forearms,
- Lift your shoulders down your torso and towards the ceiling,
- Engage uddhiyana bandha (navel to spine) to activate the core,
- Squeeze your thighs together,
- Point your toes towards the ceiling and continue lifting away from the floor and up towards the ceiling.
- Stay in the pose for 10-15 controlled breaths.
- To come out of the pose, start to hinge at the hips and feel your legs ascend down towards the back of your mat. Press through the forearms as you slowly lower your legs using your core. Come down and rest in child’s pose/balasana for 5-10 breaths.
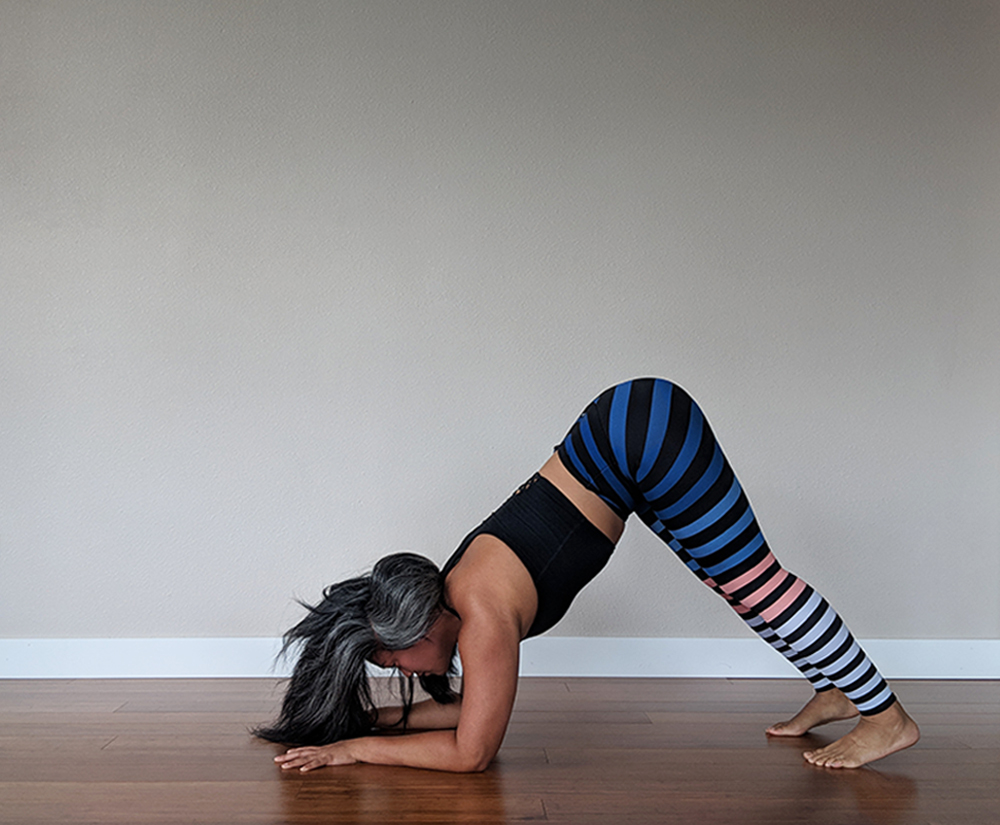
From table top pose, shift into dolphin downward dog.
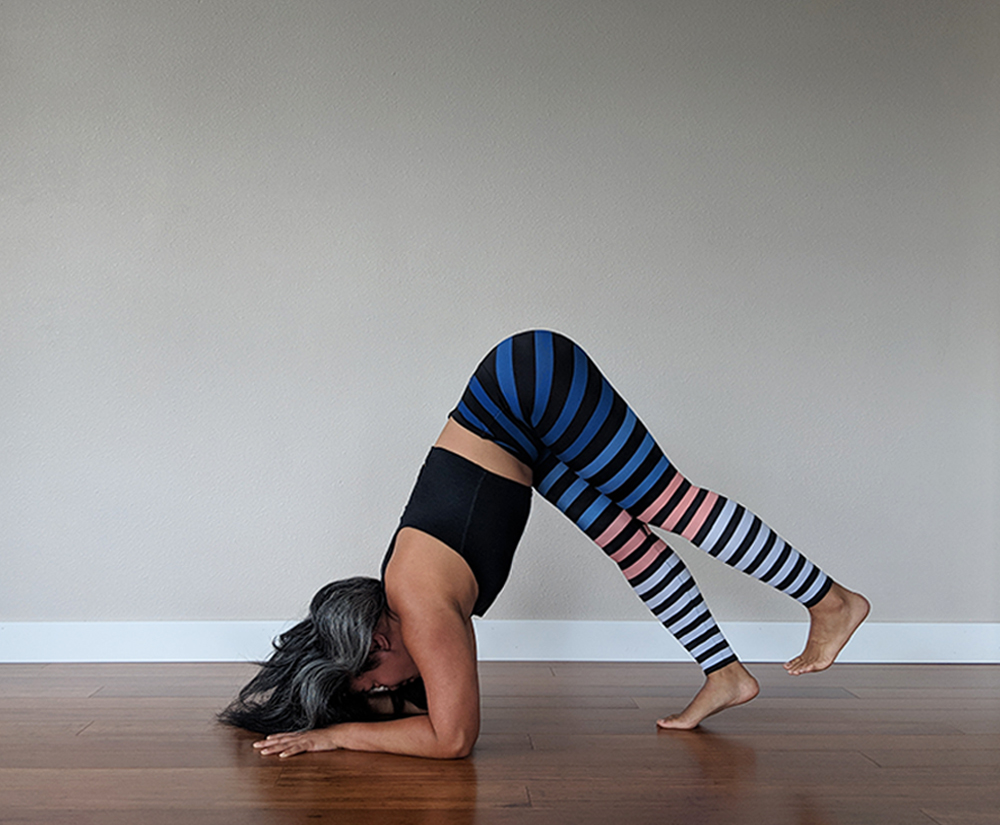
From dolphin downward dog, begin to walk your feet towards your arms until the glutes are over your shoulders.
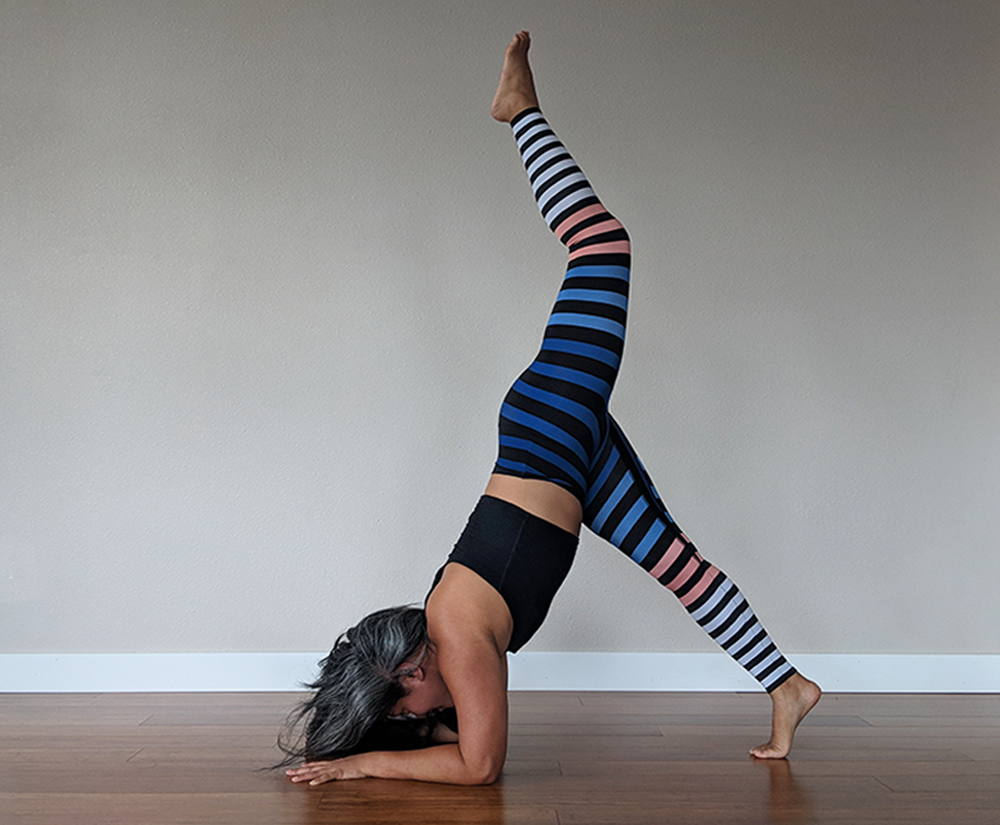
From dolphin downward dog, begin to lift a leg and come into three-legged dolphin downward dog.
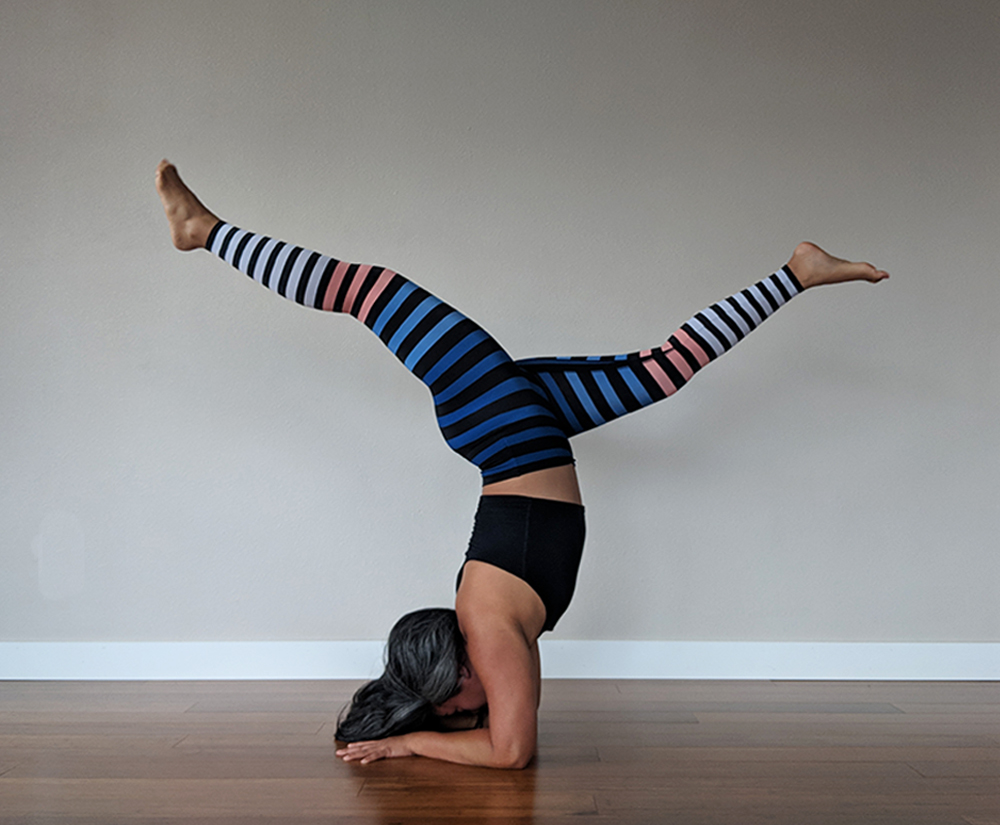
Kick-up or shift your weight into V-shaped legs position over your forearms. Maintain balance here until you can bring legs over your hips and above your torso.
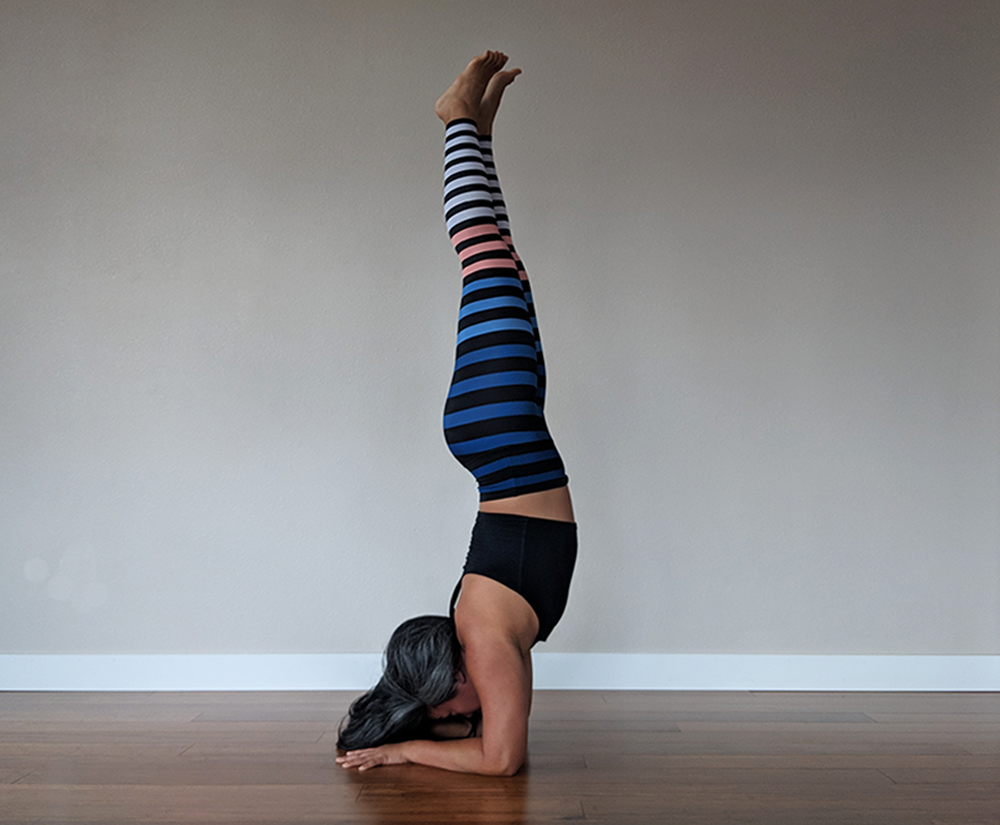
Pincha Mayurasana or Forearms Stand
Tips for Beginners
Props can be very helpful in this inversion. Here are some ways you can use props to achieve forearm stand.
- Place a block in between your hands. Make an “L” shape with the thumbs of each hand (the right hand will be a backward “L”). Place your hands around the block so that your thumbs are on the front of the block and the pointer fingers are on the sides with the palms flat against the floor. The block will keep your arms in place as you invert.
- Straps are also very helpful. Make a loop with your strap that is as wide as your shoulders. Slide the loop onto your arms just above the elbow to keep the arms from splaying out to the sides. This will make your forearm stand base very sturdy and strong.
- Many of my students will be hesitant with jumping up. It does take time and practice. If you don’t want to feel rushed in a class setting, try jumping up at home. It took me over 2 years to become fully steady and stable in this inversion.
Tips for Advanced Practitioners
- Once you feel comfortable kicking up using the block and the strap, begin to wean yourself from the props. It’s important to remember to always make sure that the elbows stay in line with the shoulders and do not splay out to the sides. Your arms will need to be engaged and firm with the weight of the legs over the torso.
- When you can do the pose on the wall consistently, begin to attempt to move into the center of the room. You can work with a partner or alone. The method will be the same as when you were working with the wall, however you will have built more strength and stability in your arms to and core to control your ascent and descent.
Like this post? Please share and save it on Pinterest!
Thank you for visiting today! If you found this encouraging or informative, please connect with us on Instagram or TikTok. Sign up for our monthly newsletter for updates and more. We promise we won't spam you! Feel free to unsubscribe anytime. If you're a brand and want to work with us, please visit this page to get in touch.

